User and group management in Microsoft Entra is a fundamental task that empowers you to manage access, collaboration, and security within your organization. This guide will walk you through the process of creating users and groups, enabling you to efficiently organize your digital workspace.
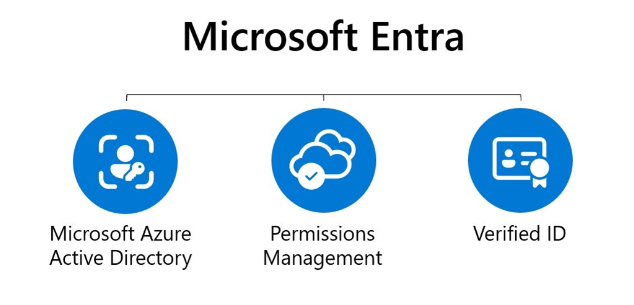
Table of Contents
1. Understanding User and Group Management in Microsoft Entra
In Microsoft Entra, managing users and groups is a key part of keeping things organized and secure. This means arranging individual users and putting them into groups based on what they’re responsible for, what they’re allowed to do, and how they work together. When these users and groups are well-organized, it makes things safer, helps control who can access what, and encourages everyone to work together smoothly.
When we talk about managing users, we’re talking about tasks like creating new accounts, making changes to existing ones, and removing accounts when they’re no longer needed. This helps make sure each person can get to the right programs and files they need for their job, which keeps work flowing nicely. On the other hand, group management is about creating bunches of users who all have similar jobs or are working on the same projects. This makes it easy to give them the same permissions without having to set up each person individually.
Understanding how to manage users and groups in Microsoft Entra is really important if you’re in charge of making things run smoothly in your digital workspace. It’s not just about keeping things organized – it’s about making sure people can work well together and that everything stays safe and secure.
2. Accessing User and Group Management in Entra
Log in to the Entra dashboard using your Microsoft 365 credentials, as shown below.
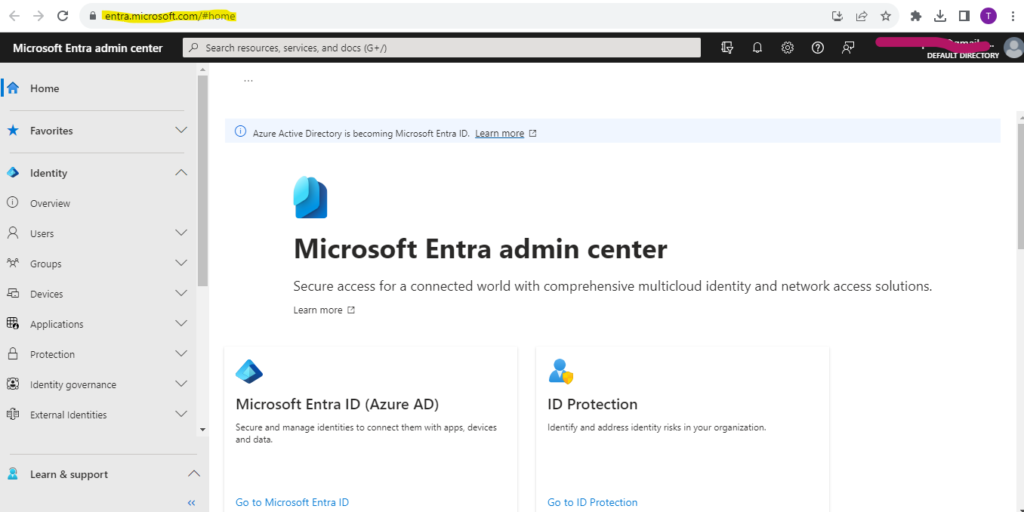
Navigate to the user and group management section, typically found under the “Users” or “People” tab. This is where you’ll initiate the creation process.
3. Creating Individual Users
To create an individual user, click on users-> click on All users-> click on user-> click on create new user as shown below.
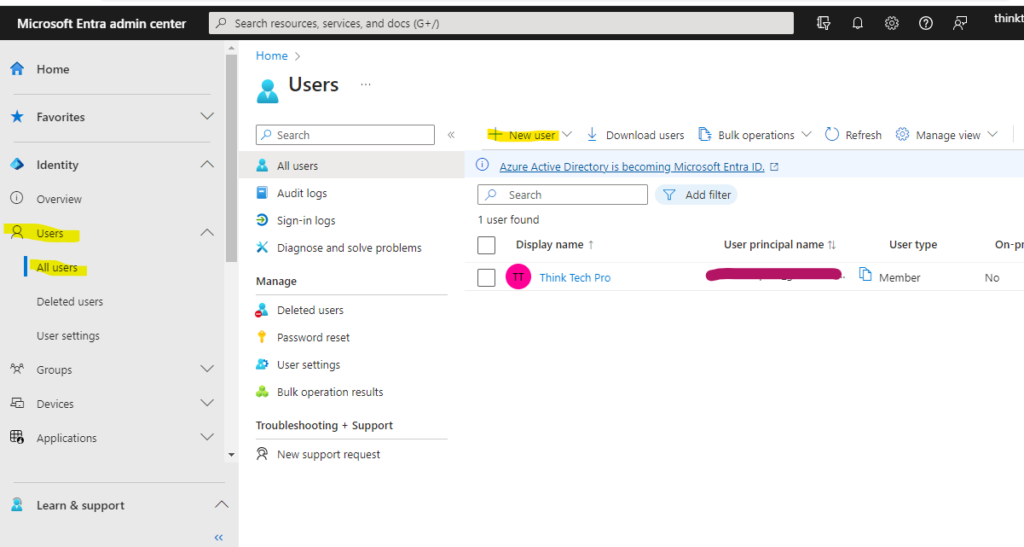
Provide the user’s principle name, here we give name as user1 select your domain. Enter the display name and password and click review+create.

4. Creating Groups for Seamless Collaboration
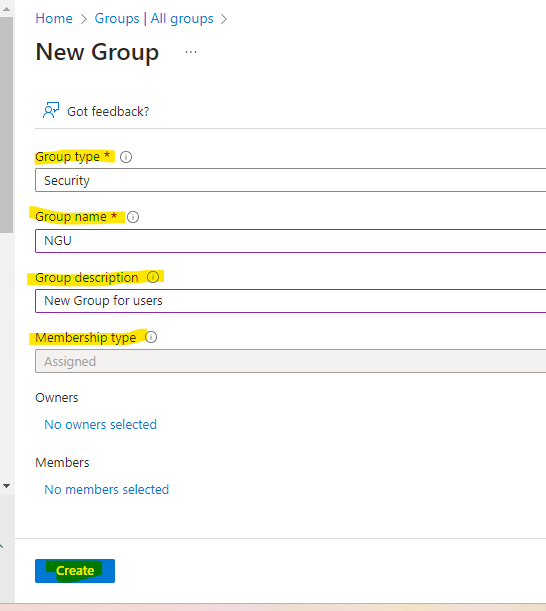
Creating groups simplifies collaboration by allowing you to manage permissions for multiple users at once. Define a group’s purpose, add a relevant name, and select members who share common responsibilities or projects as shows below.

Click on Groups -> Select All groups -> click on new group. Define group types, Group Name, Group description and member type as shown below.
5. Adding Users to Groups
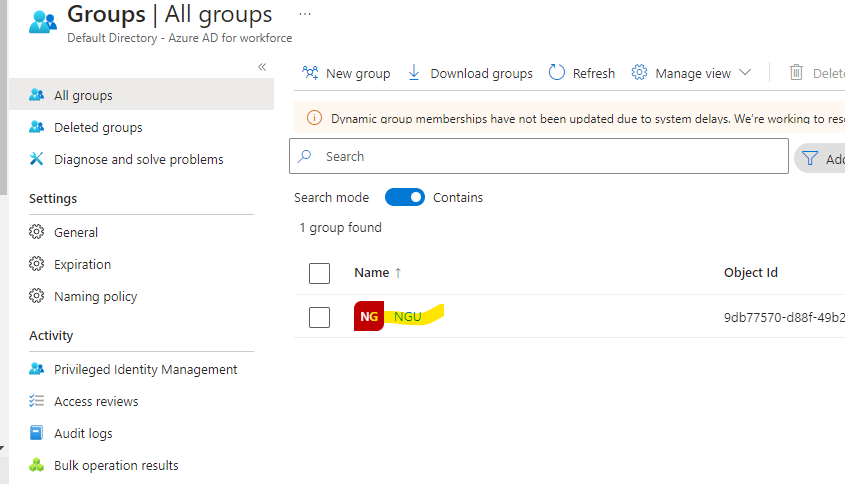
After creating a group, add users to it. This grants members access to shared resources and enhances teamwork. To adding the users in group click on group -> double click on group name for example NGU
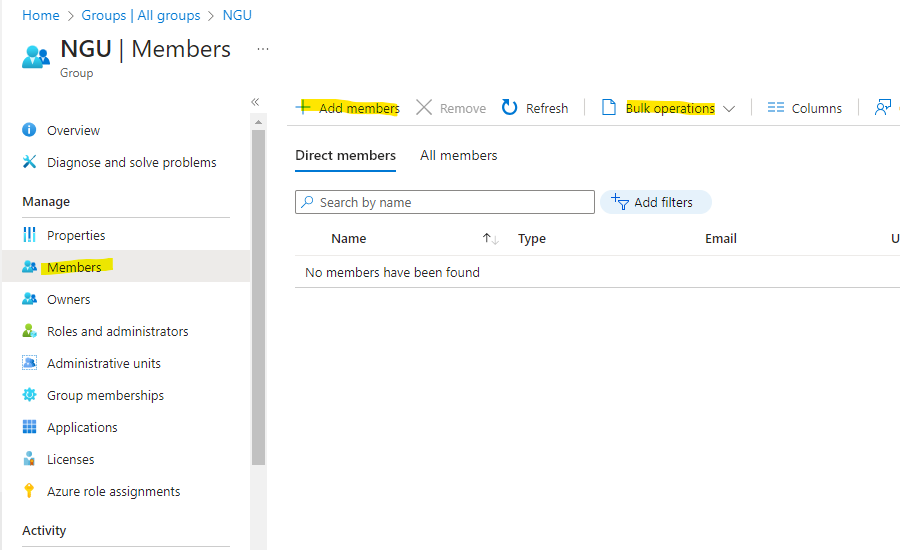
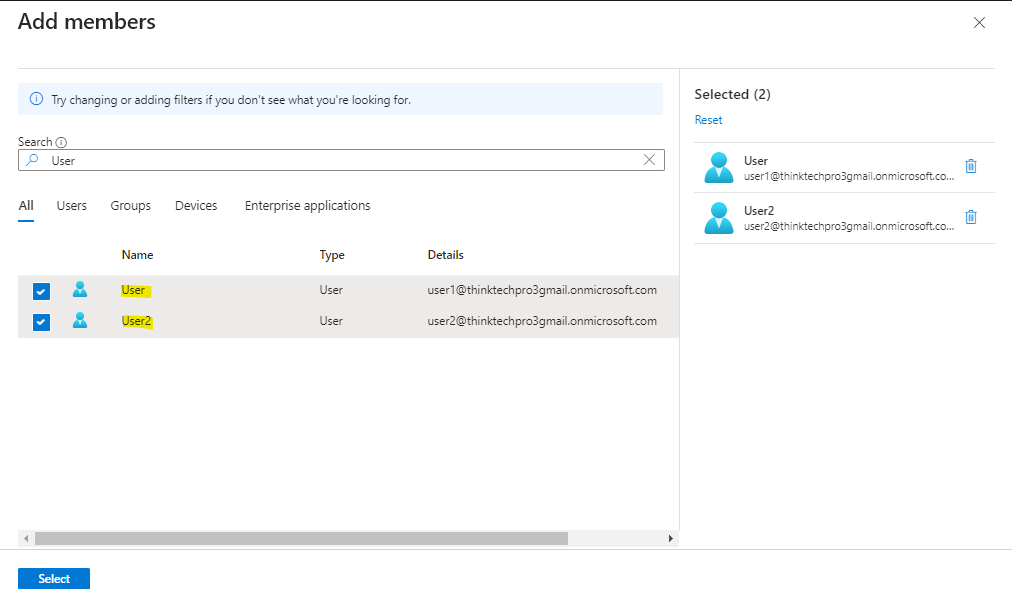
Now click on members -> click on add member. You can also add bulk users by clicking on bulk operation as shows below
6. Setting Permissions and Access
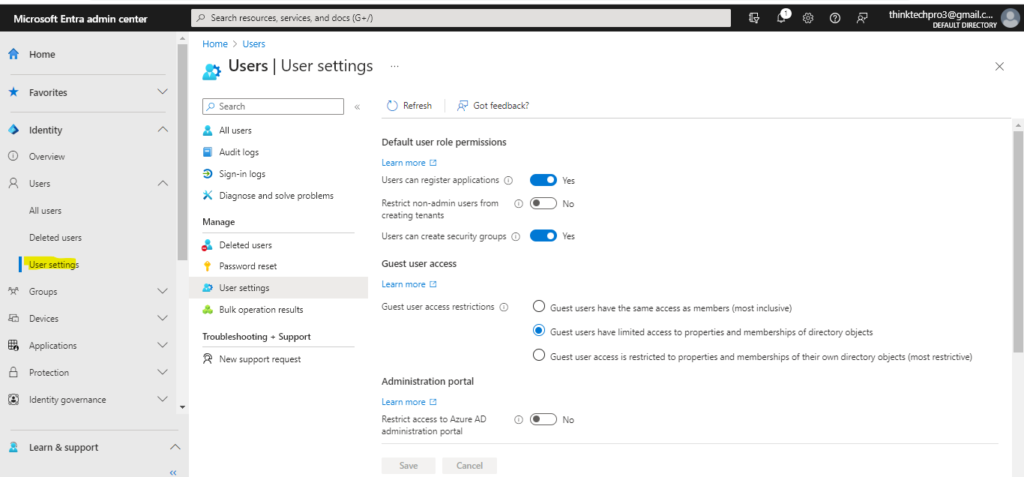
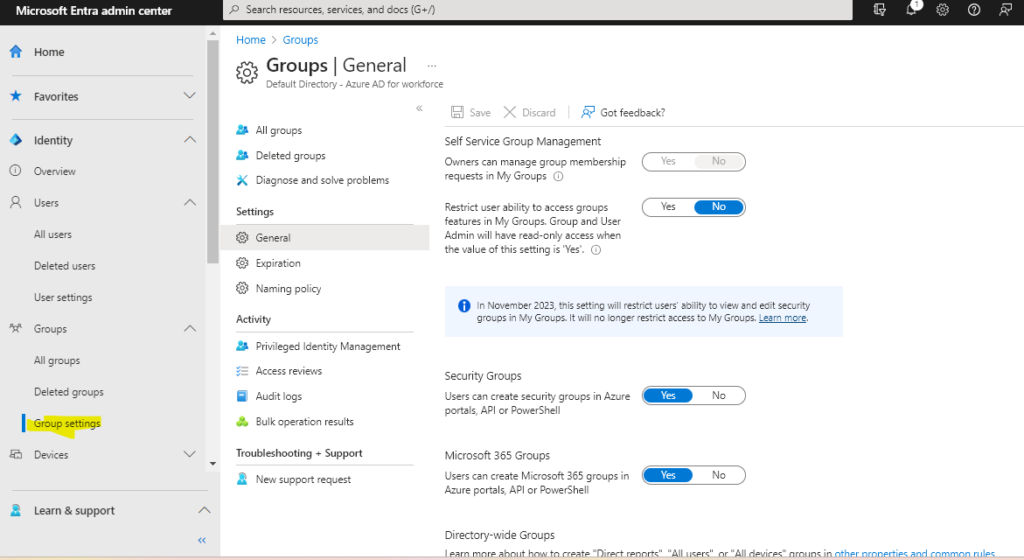
Fine-tune permissions for users and groups to ensure they have the appropriate access level to resources. Define access to applications, files, and communication channels based on roles and responsibilities.
7. Monitoring and Updating User and Group Status
Monitoring and updating user and group status in Microsoft Entra involves keeping an eye on who’s using the platform and making sure everything is up to date.
First, you log in using your info. Then, you find the place where you manage users. You can see a list of users and their status, like if they’re using Entra or not.
If someone’s status needs changing, you click on their name, make the update (like saying they’re active or not), and save the change.
Same goes for groups – you can manage their status too. Regularly checking and updating is important to keep things organized and make sure everyone has the right access.
8. Best Practices for User and Group Management
To keep things neat and tidy, follow these good ways for managing users and groups. Look over who can do what often, and take away access from people who aren’t using it anymore. Also, make sure the groups match up with what the project needs. This is important for keeping everything running smoothly and making sure the right people have the right jobs in the groups. So, remember to check in regularly and make changes as needed to keep everything organized and on track.
9. Conclusion
Creating users and groups in Microsoft Entra lays the foundation for efficient administration and collaboration. By following this guide, you’ve gained the knowledge to organize users, streamline permissions, and optimize access to resources. As you leverage these tools to enhance your organization’s efficiency and productivity, remember that user and group management is not just about creating accounts; it’s about orchestrating a cohesive digital ecosystem that empowers your team to excel.
To learn more about the Microsoft Entra, click here
Please provide comments for your suggestions or queries.
